Blog 47: The Big Finish
Hiya! its been a couple of busy months since our last blog post… so lazy on the posting for sure.. but flat out like a lizard drinking on finishing up the house :-)
Lilly has been on the look out every day for a blog-post…

Lily, its coming.. its coming..
So here it is! the BIG 2 month monster catchup post for the many final touches and.. drum-roll… we have fully moved out of the B&B flat into the main house back in October :-)
Let’s start the recap with finishing the exterior lime plaster, soffits and exterior lighting. Exterior plastering is very weather dependant so a bit stop and start (no problem really as we worked on finishing tasks inside and out in between) and a lot of working at heights again on the scaffolding.
We were hoping for low winds, cloudy and even damp days for applying and curing the lime plaster, unfortunately this year the spring equinoctial winds from the west kicked in early and kept on blowing. So as we couldn’t wait indefinitely, our lime plastering needed many hands for the North face of the house as it was going-off super fast on the wall - just as well we have a great team so we could manage it.

Fresh lime plaster

Troweling the finish coat on by hand and finishing it straight after..
We also put up the window head and soffit flashings, cut and oiled the ply sheets for the soffits and then as they went up, we also installed and tested all of the deck, exterior flood and sensor lighting supplied by Lighting Direct in Napier. Competition for scaffolding was high between the trades, in good spirit :-)

Flashings, flashings, flashings - there is a lot of detail in constructing a wall system that will last
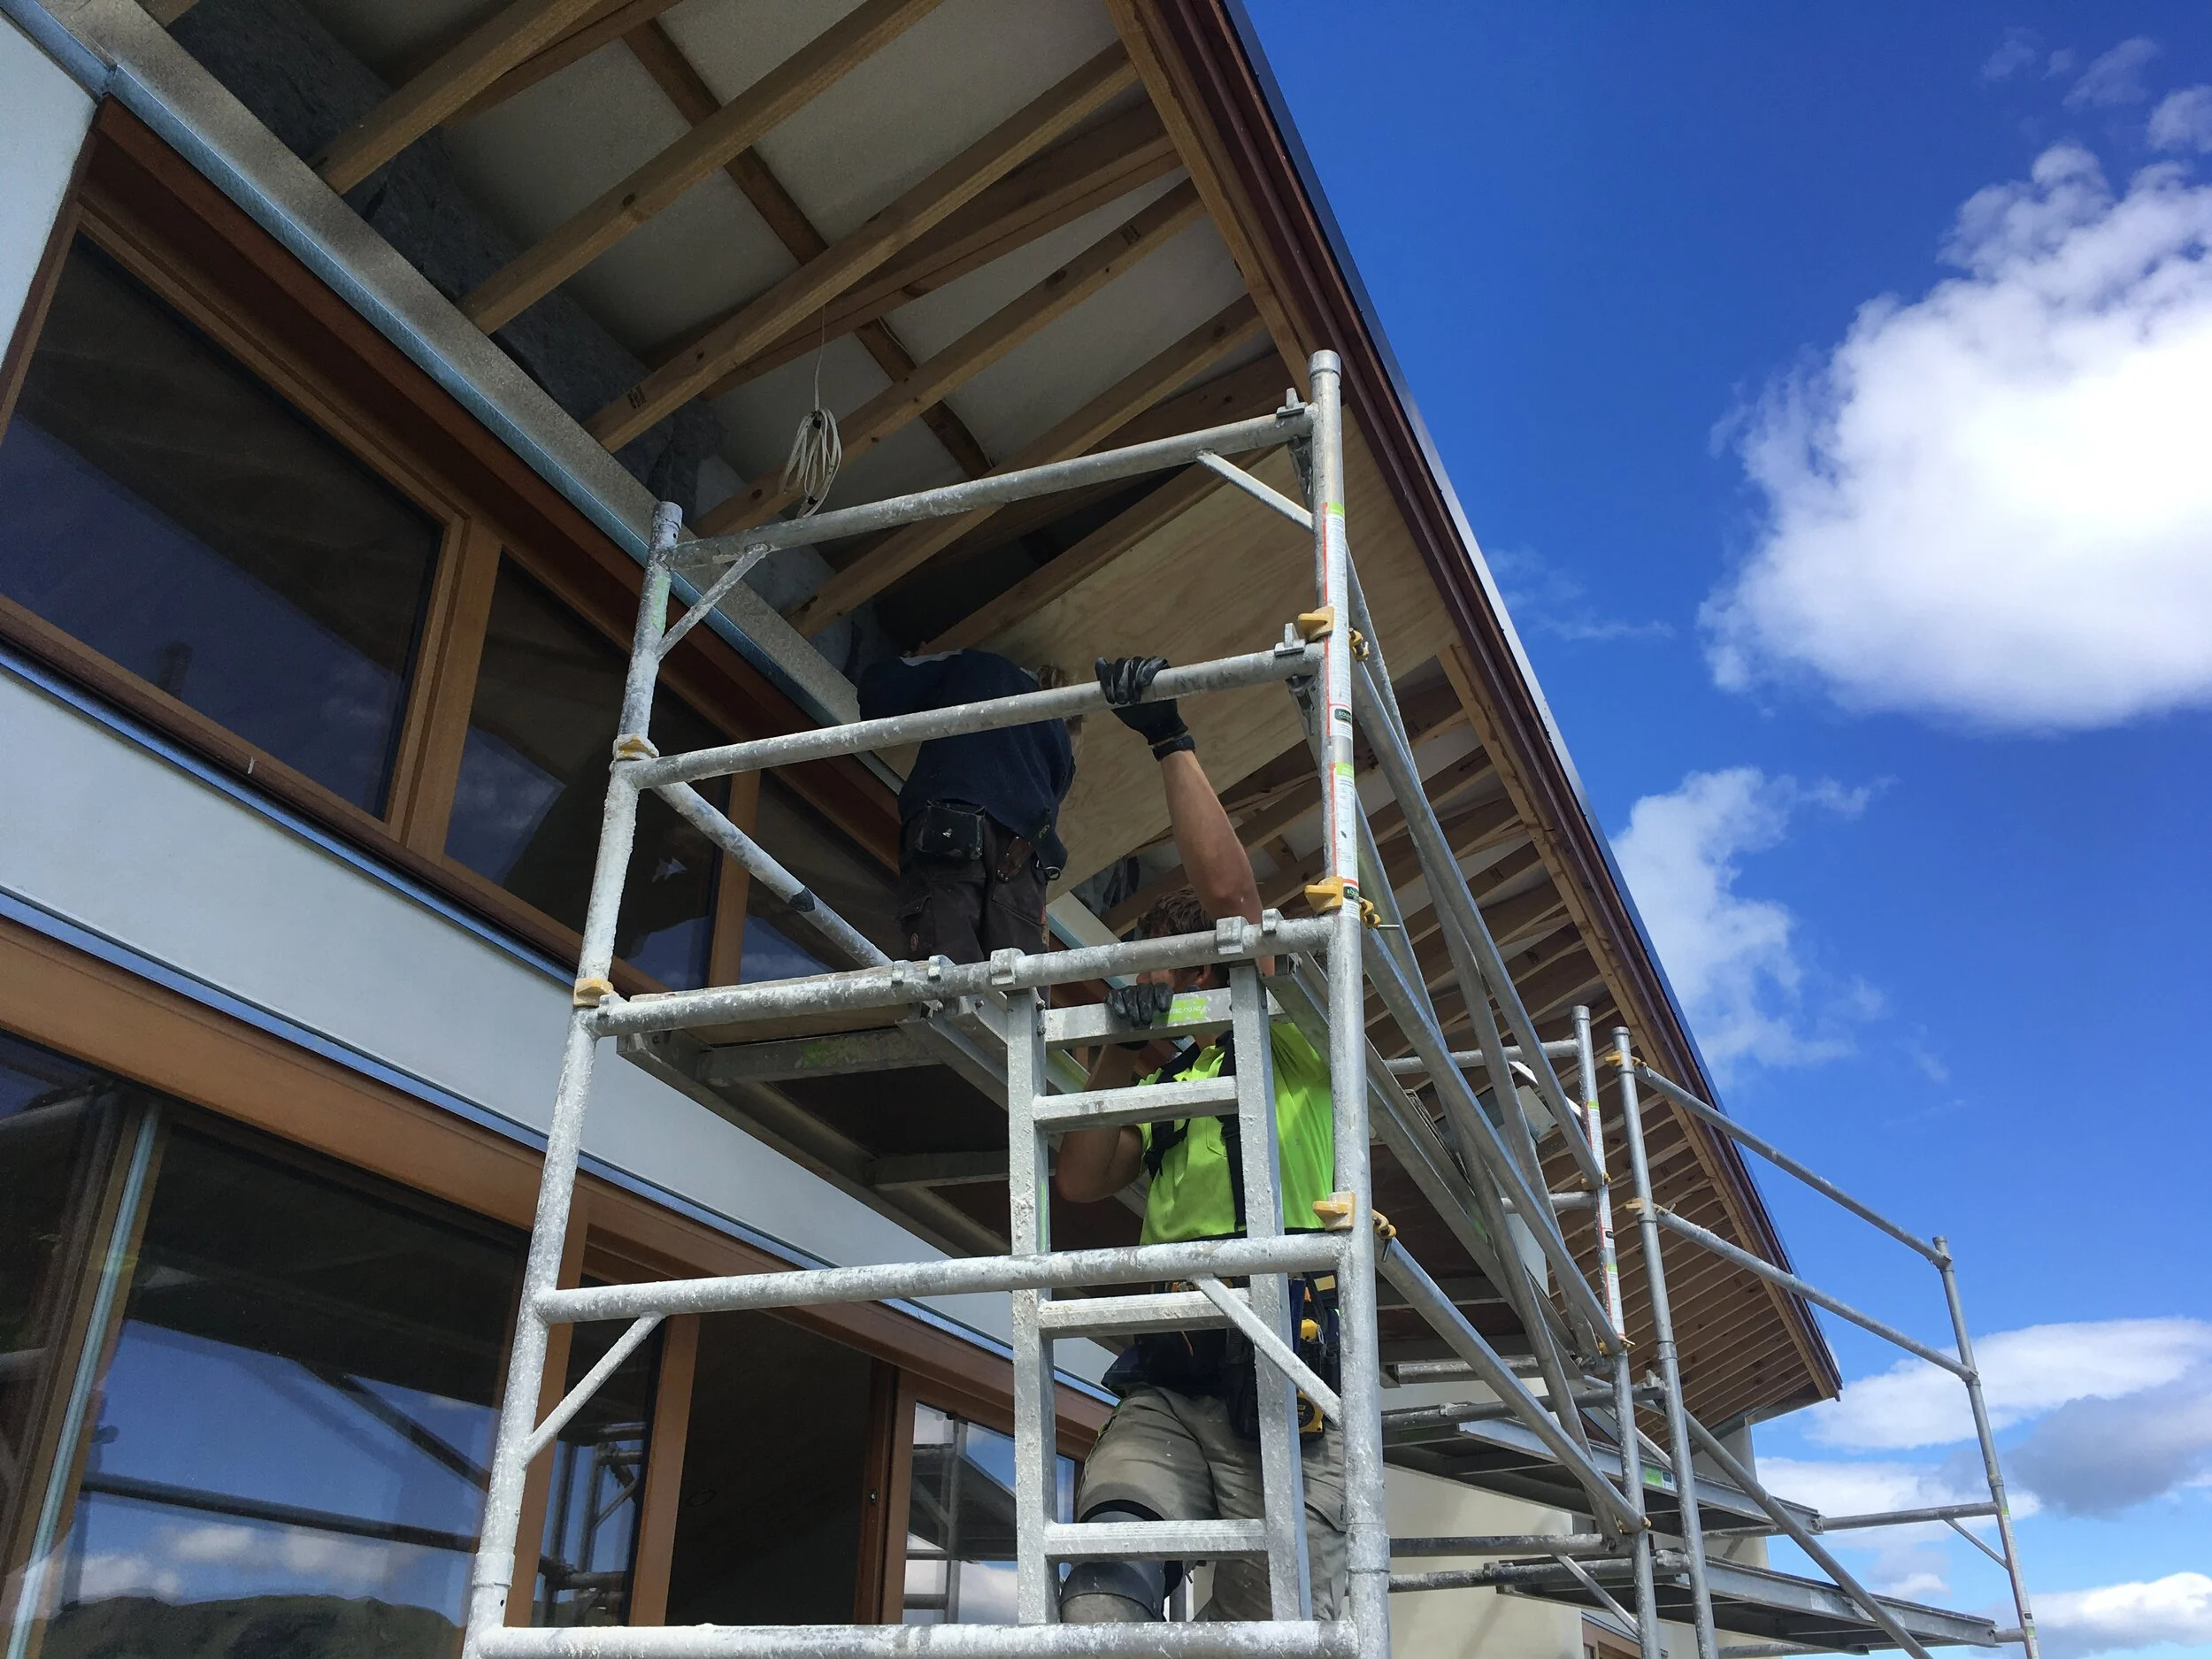
The beginning of the end, Nils and Everett putting up the first sheet of ply for the North soffit lining

Nils and Pat put in the final piece of soffit lining on the West, while Bob and Geoff are on the North fitting off the sensor and floodlight for the B&B front deck
A big call out to Nils and Pat for the amazing transition of the soffits from 25 to 12.5 degrees as they rounded from the front to the sides of the house - a very tricky detail.
The 25 degree soffits on the front of the house has the interior ply ceiling line sweep straight out through the windows and just keep going, an important part our original concept design.. So why 25 degrees? you may ask.. because it is the angle of the mid-winter sun at midday, so maximising our passive solar heat gain inside the house in the cooler months. And why the big, almost 2 metre, eaves on the North of the house? because it allows for the angle of the summer sun, minimising passive solar heat gain inside the house in hot weather - in summer our thermal mass cools the house.

We have now lived through the tail end of winter, into spring and heading into summer in our new home - we are very very happy to report that the passive solar design that we developed with Alex from GreenHaus architects is working great in practice! it’s everything we had hoped for :-)
Of course our multi-tasking has still been running in full swing throughout this period, with interior finishing touches; our last major joinery install - the kitchen island, more tadelakt in the main bathroom, more sgraffito and plaster oiling in our living room toilet etc.. etc.. here we go….
Having salvaged our rimu kitchen cabinet carcasses from Pheonix Building Recyclers, there was still a lot of work to do. A big call out to John who took on making old bent wood straight and level, while chopping and rebuilding the cabinets to fit - his final piece was the kitchen island cabinet and it was a real test - well passed as it was perfectly square when we put it in final position, with no wedging or packing needed !

John says farewell to the reconfigured kitchen island cabinet as it leaves the Willow drive joinery factory on Marks car trailer.

Danish oiling the island cabinet frame inside and out

Matai benchtop with undermount sink (thanks John and David from Hortops), oiled and ready to mate with the island cabinet frame (thanks John Wise)

Power and plumbing for the island emerging from our concrete floor

Water and power cables in, and yes its perfectly level!

Fitting off, bench and sink, bins, dishwasher etc..

Starting to T&G line the cabinet frame..

The island cabinet fully lined with T&G that I had run at Napier Timber processors from our Matai fence pailings. We had just enough.. to the last board :-)

Big thanks to Lesley for reupholstering all of our mix-and-match dining room chairs and cane chairs
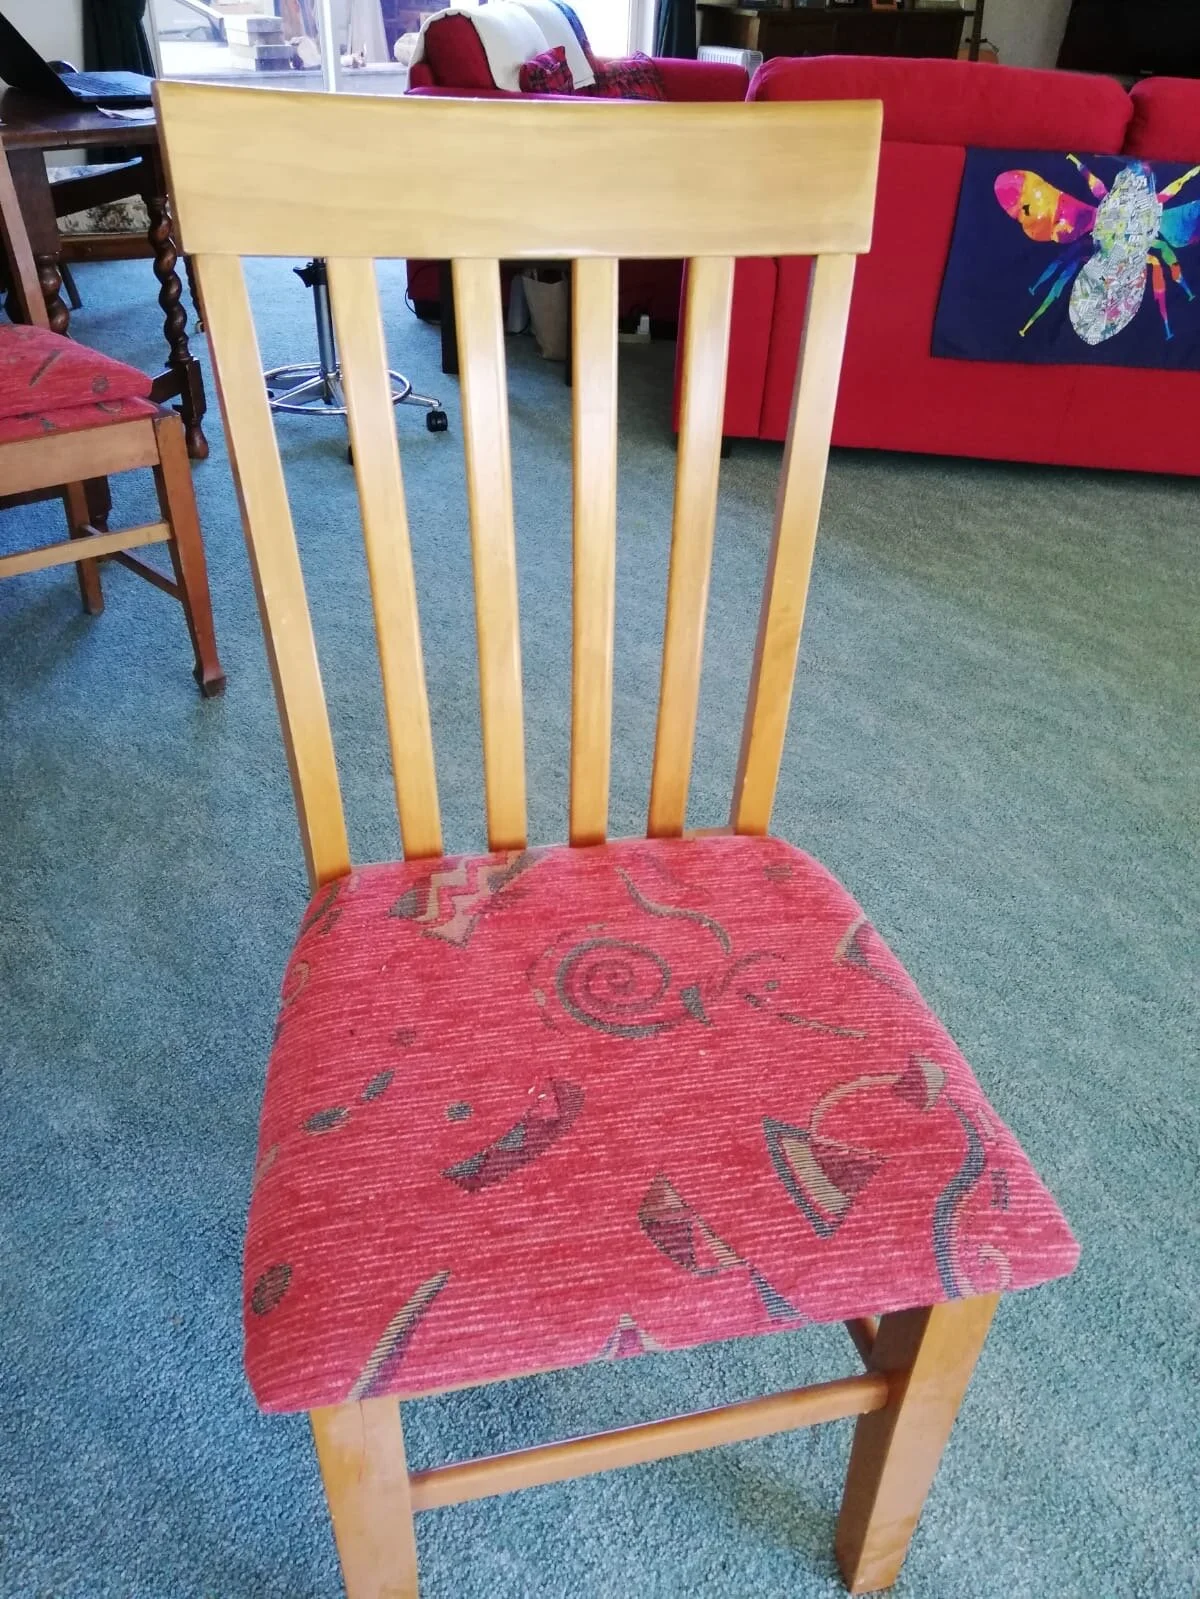
Another one.. they look great and are super comfortable
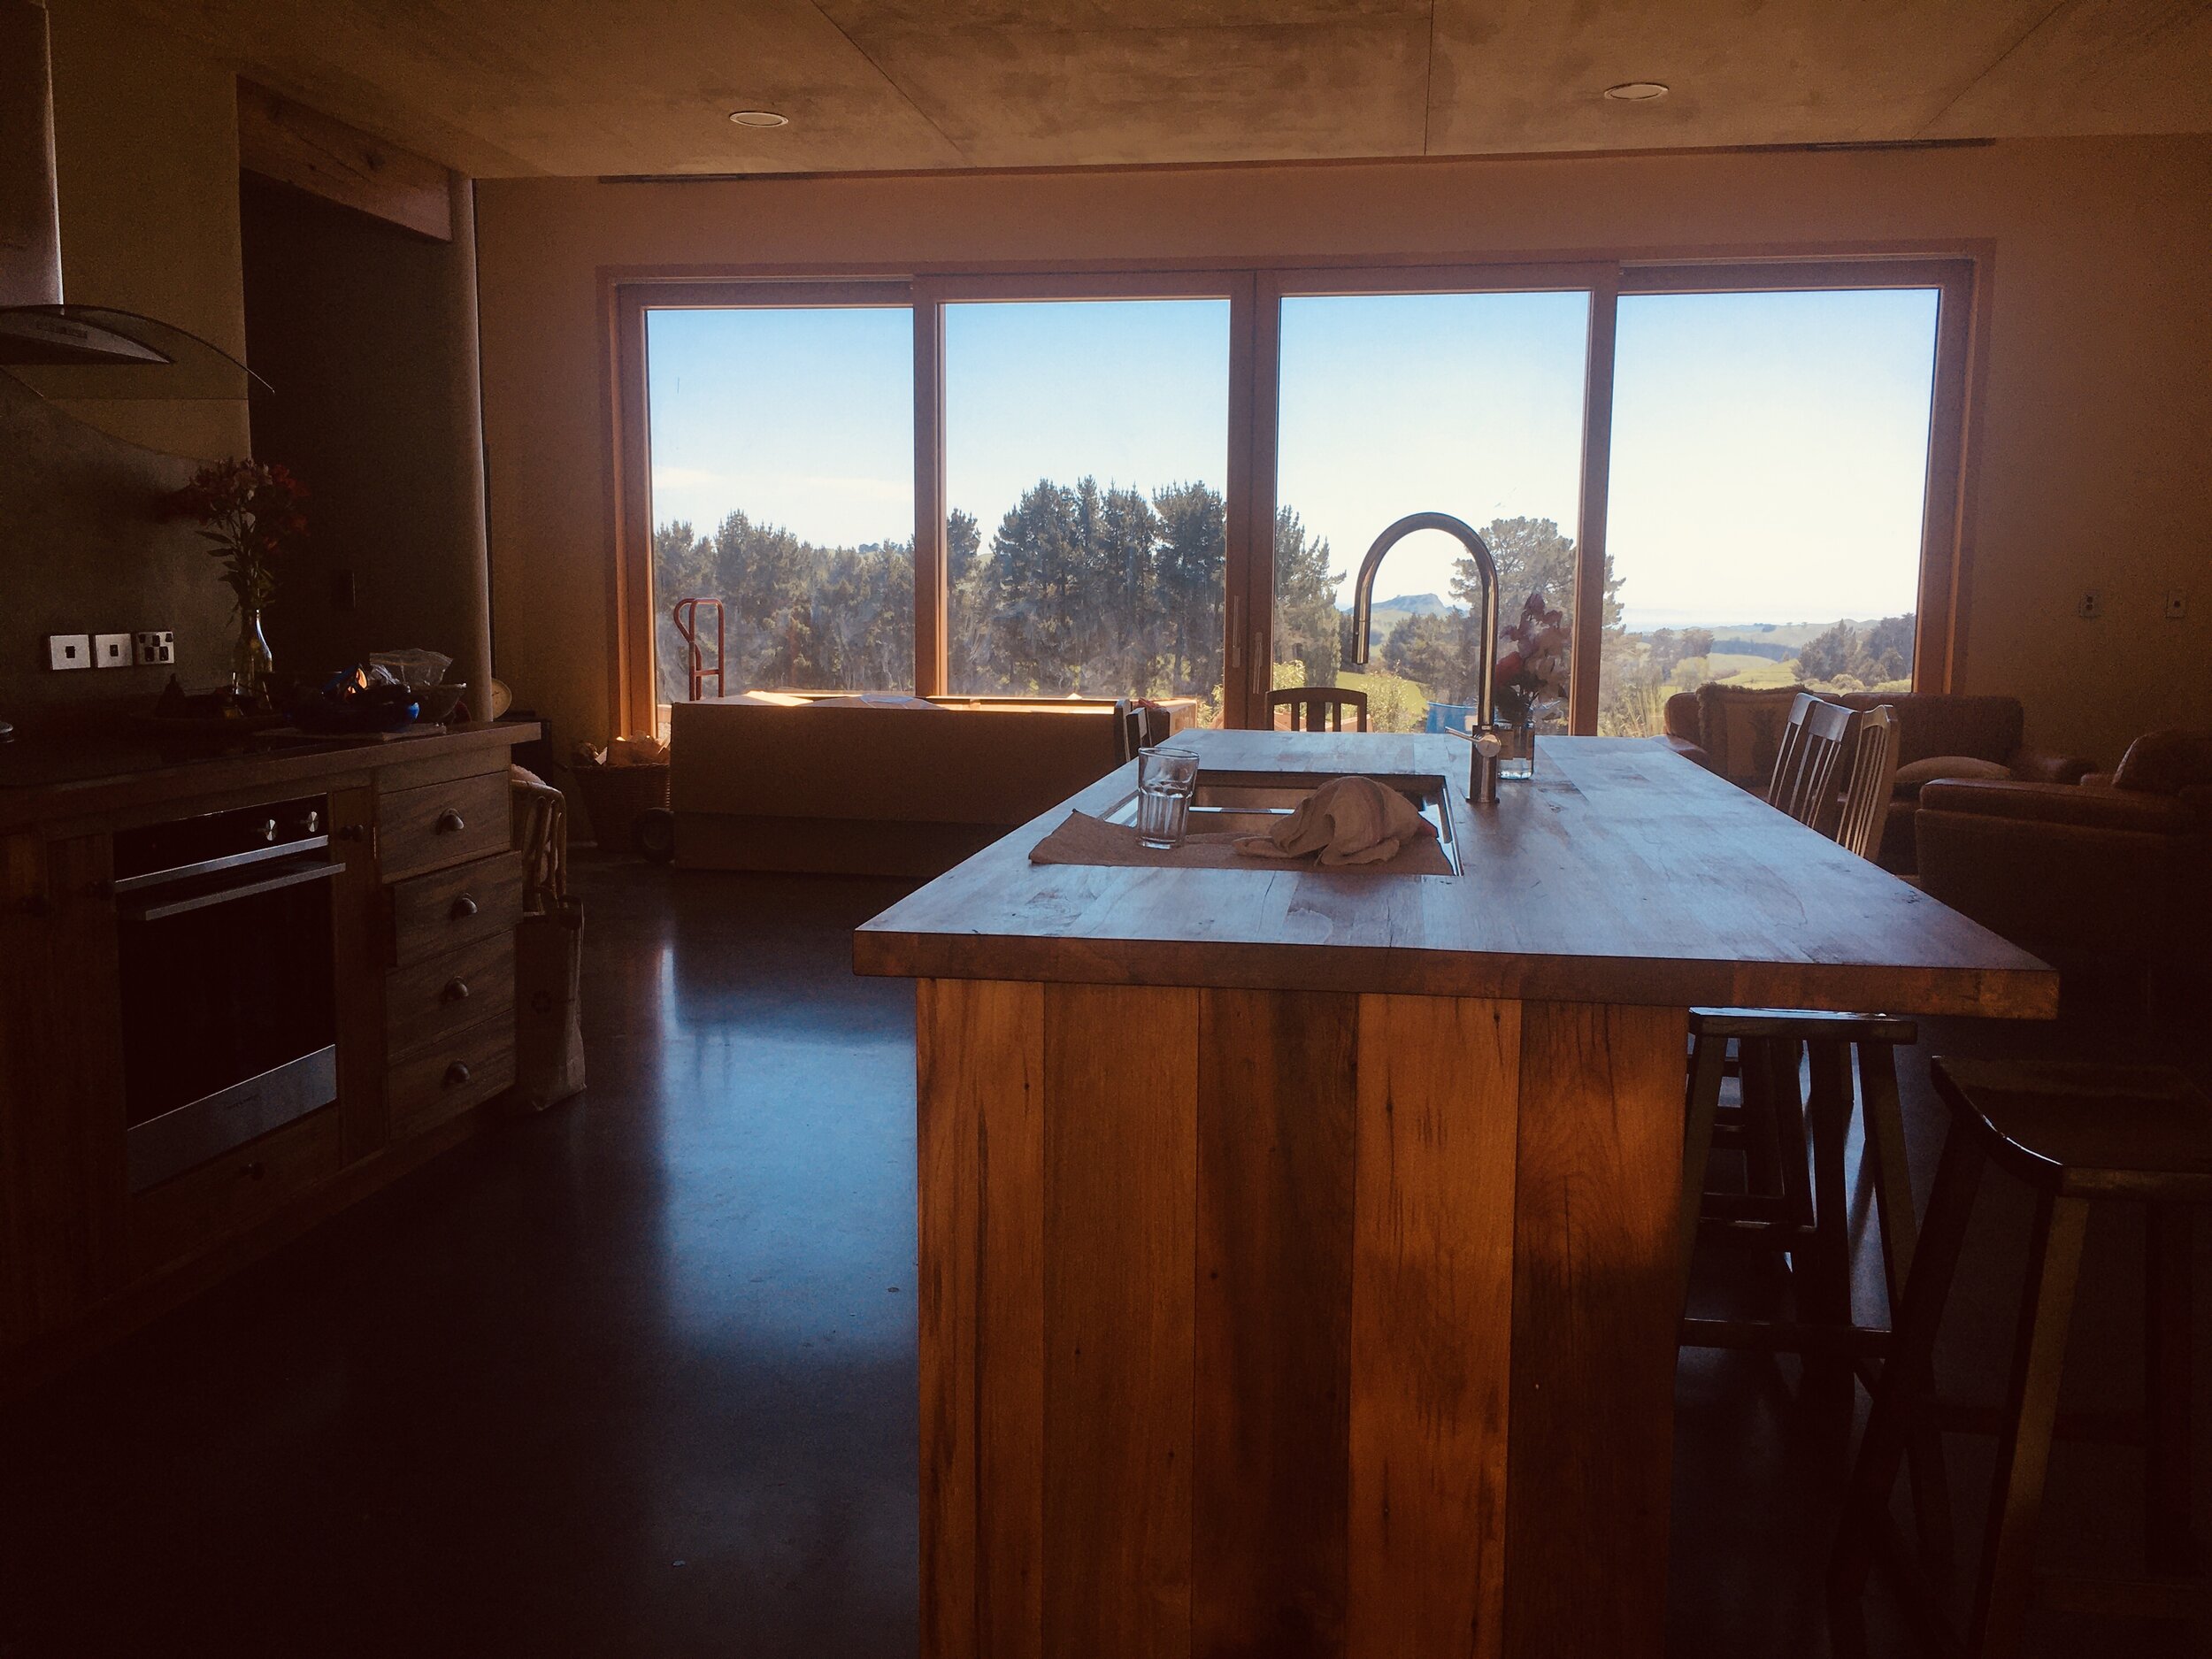
Plumbed in thanks Kenny. The finished island looking North..
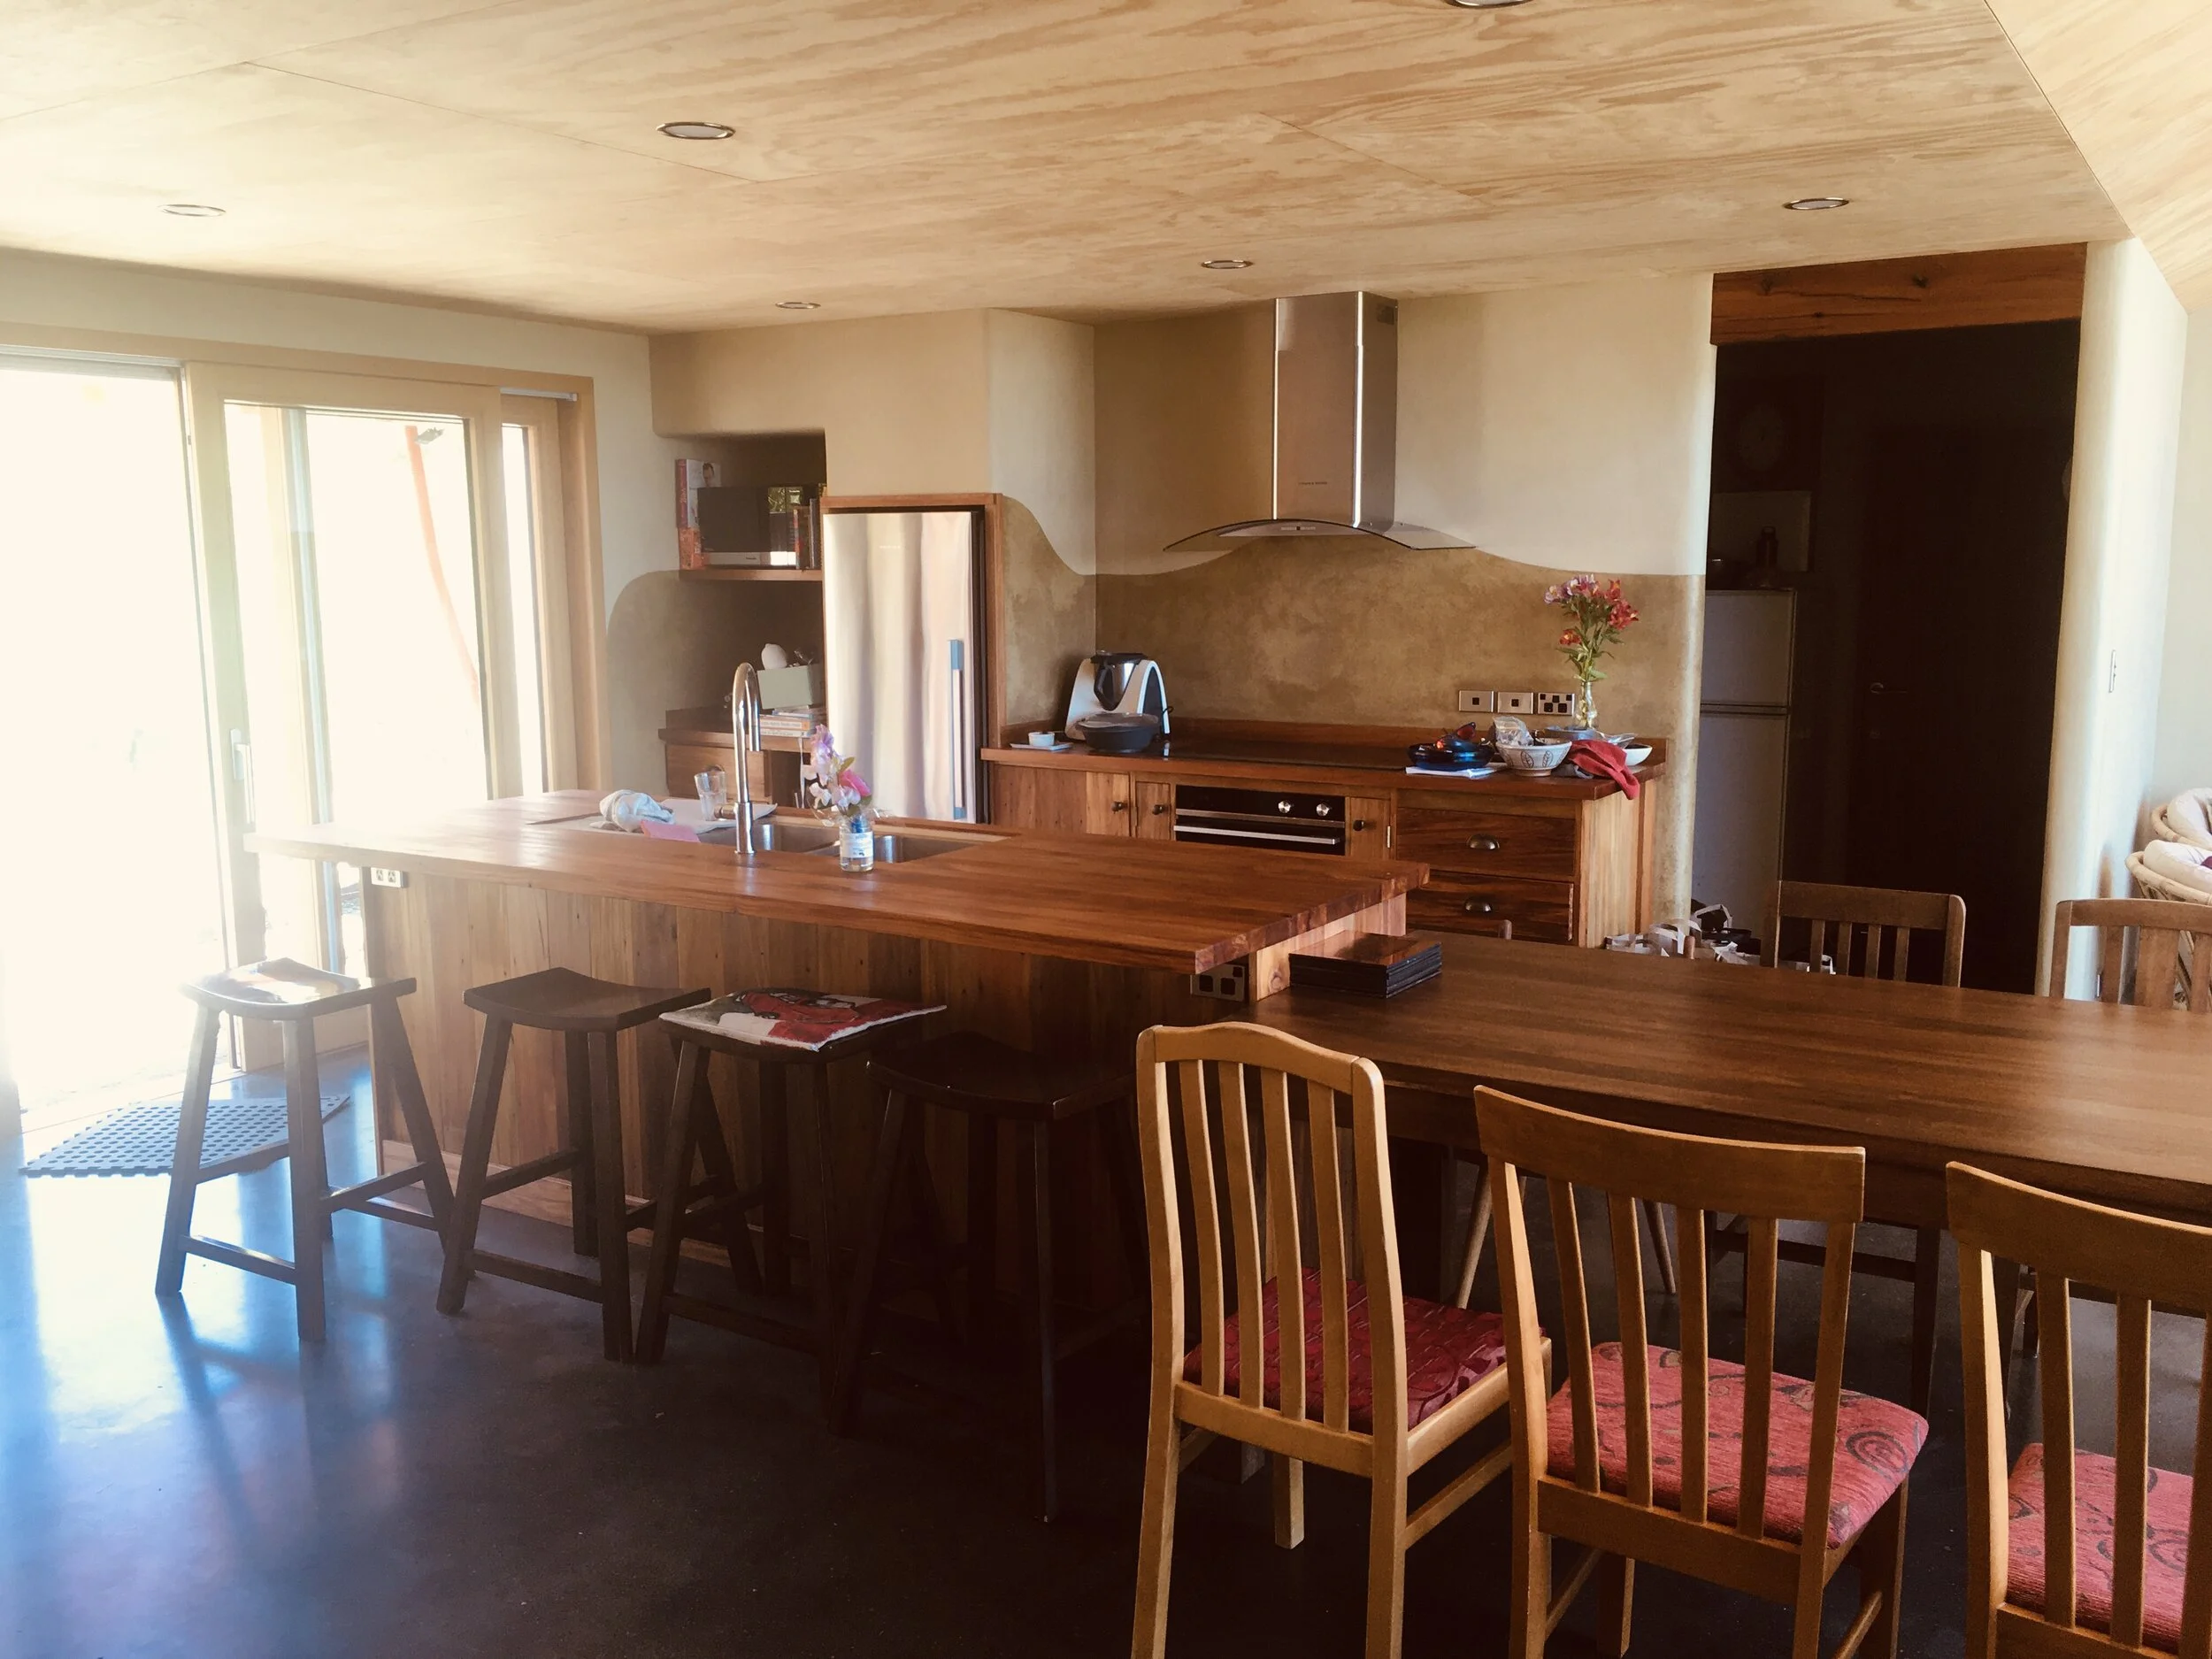
The main kitchen and dining area is complete, we are using it and we love it!
With the kitchen in, our interior wiring was complete, so we shifted electrical focus to all of the exterior flood lights, deck lights, sensor lights etc.. and to getting our electrical certificate of compliance to sign off the job. Big thanks to Bob and Geoff for all their work over what is now years so we first brought the power onto the site and also to Mike McCarthy for his support with commissioning it all - it all works just how we envisaged.
A quick update shot of the sgrafitto in our master bedroom that we showcased back in September, The moon-kereru was originally done as practice run (for the living room toilet wall) that could be plastered over.. it was so good that we kept it and wake up to it every morning.

From kereru to toe toe… Alessandra and Martin teamed up again for some more sgrafitto plaster artistry, it looks awesome oiled in.. and again thanks to Kenny, the living room toilet and washbasin are plumbed in and in use, another room completed :-)

Framed..
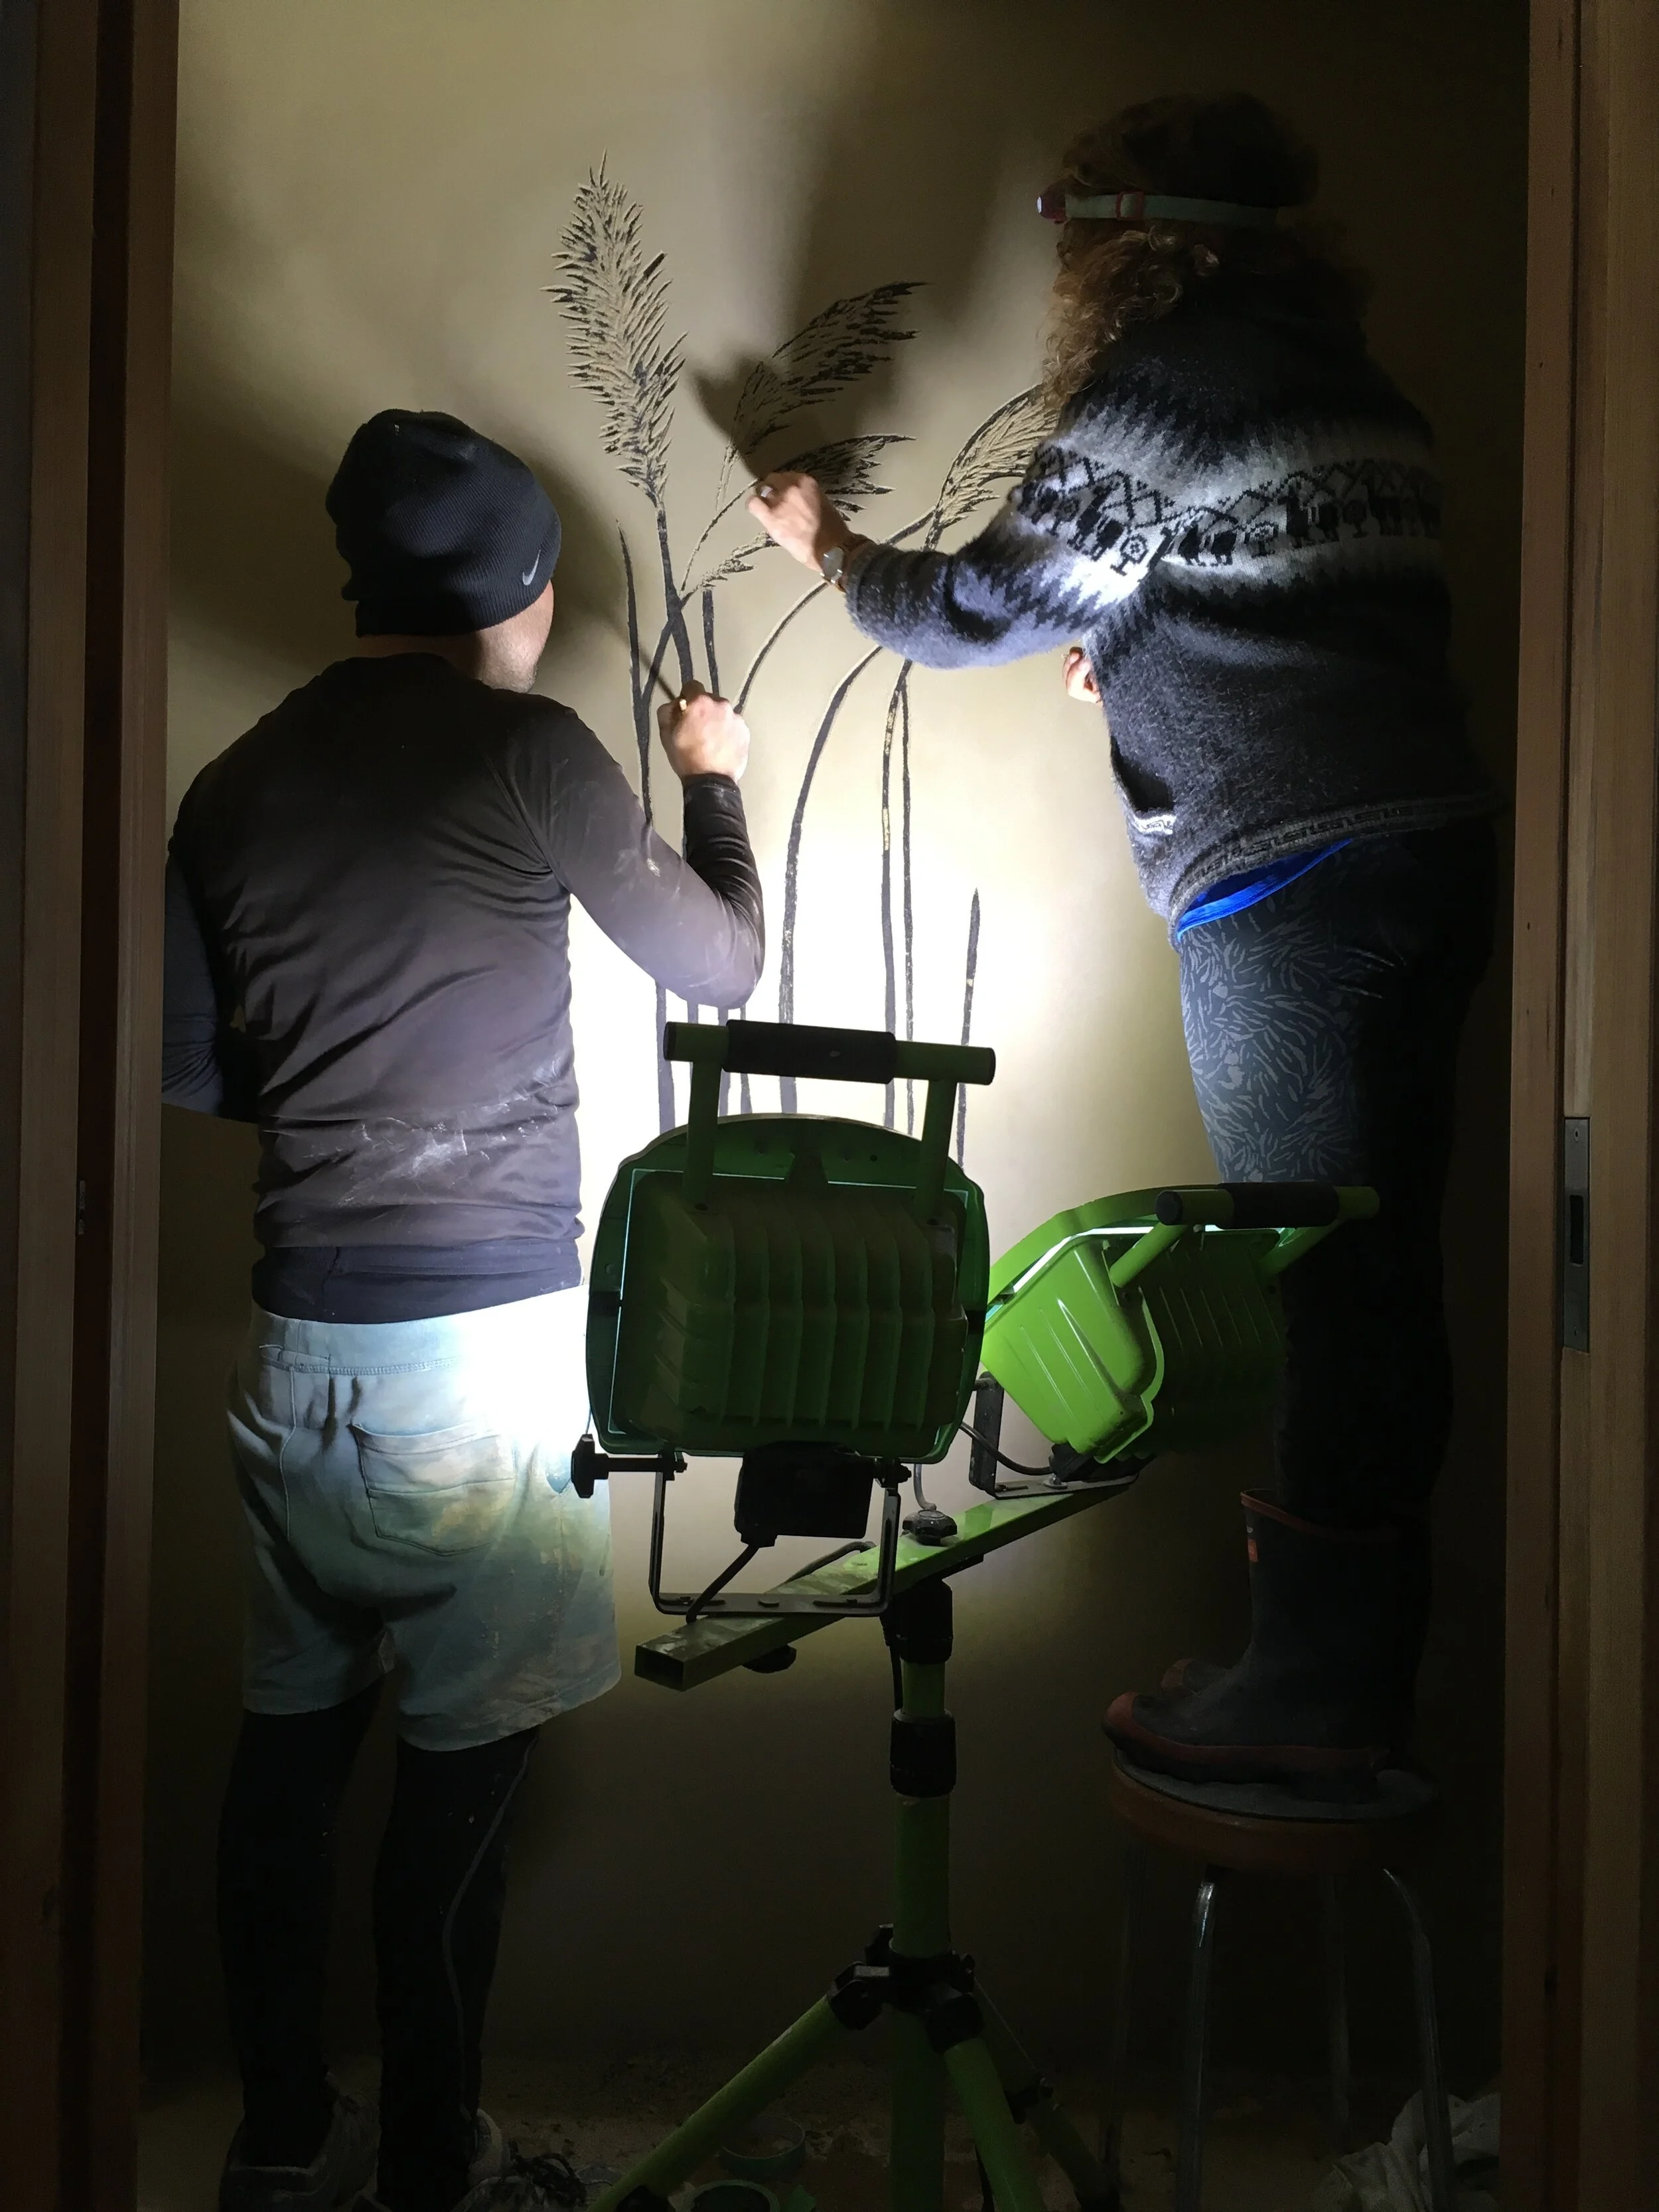
Art in progress..

Fine detail cutting into wet plaster

Sgrafitto and linseed oil for the full effect
Meanwhile the main bathroom, which is a jack and jill ensuite for our master bedroom and the second bedroom, is underway. Again we chose tadelakt for the wet surfaces but this time we changed the colour and Pat is doing a much bigger area behind the shower and around the bath.
The non-tadelakt walls in our B&B ensuite are lime plaster which we are very happy with, but in the main bathroom we chose to go with clay plaster and linseed oil the splash zones. Heres some photo’s showing the progression.


At time of writing the blog the main bathroom is on hold, waiting on the shower glass. As soon as Dave from Metro Glass installs the shower glass, Pat will complete the tadelakt around the bath and Kenny will plumb in the washbasin, toilet and bidet. We will then complete the fit-off of the wall cabinet, toilet roll holder and towel rails.
It’s all ready to go so will be completed quickly when we restart, and no rush as we are using the B&B ensuite in the mean-time. So will post a more brief update with some photo’s when it’s complete.
Back to the outside.. we also moved onto the decks, woodshed, BBQ area, outdoor bathroom, pathways and edging the house - a lot of work, and great to get it done now in the main build rather than over the coming years..
Before we could do any finishing work outside we needed to move the topsoil that was stripped off the build platform back around the house and while we had the digger on-site also cut in the veggie garden area that had been hidden under the mountain of soil. I waited to start this until we had completed the soffits and lime plastering of the south and east of the house so we weren’t tripping over ourselves - and I also moved the firewood and all other scrap from the back of the house so we could work with the digger unimpeded.
Michael from Needadigga was on-site for a day and by knock-off we had it all moved around nicely, with levels set around the house so that any ground water will flow back to our perimeter drain rather than towards the house foundations and a pile of soil setup ready for the garden in from of the B&B bathroom.
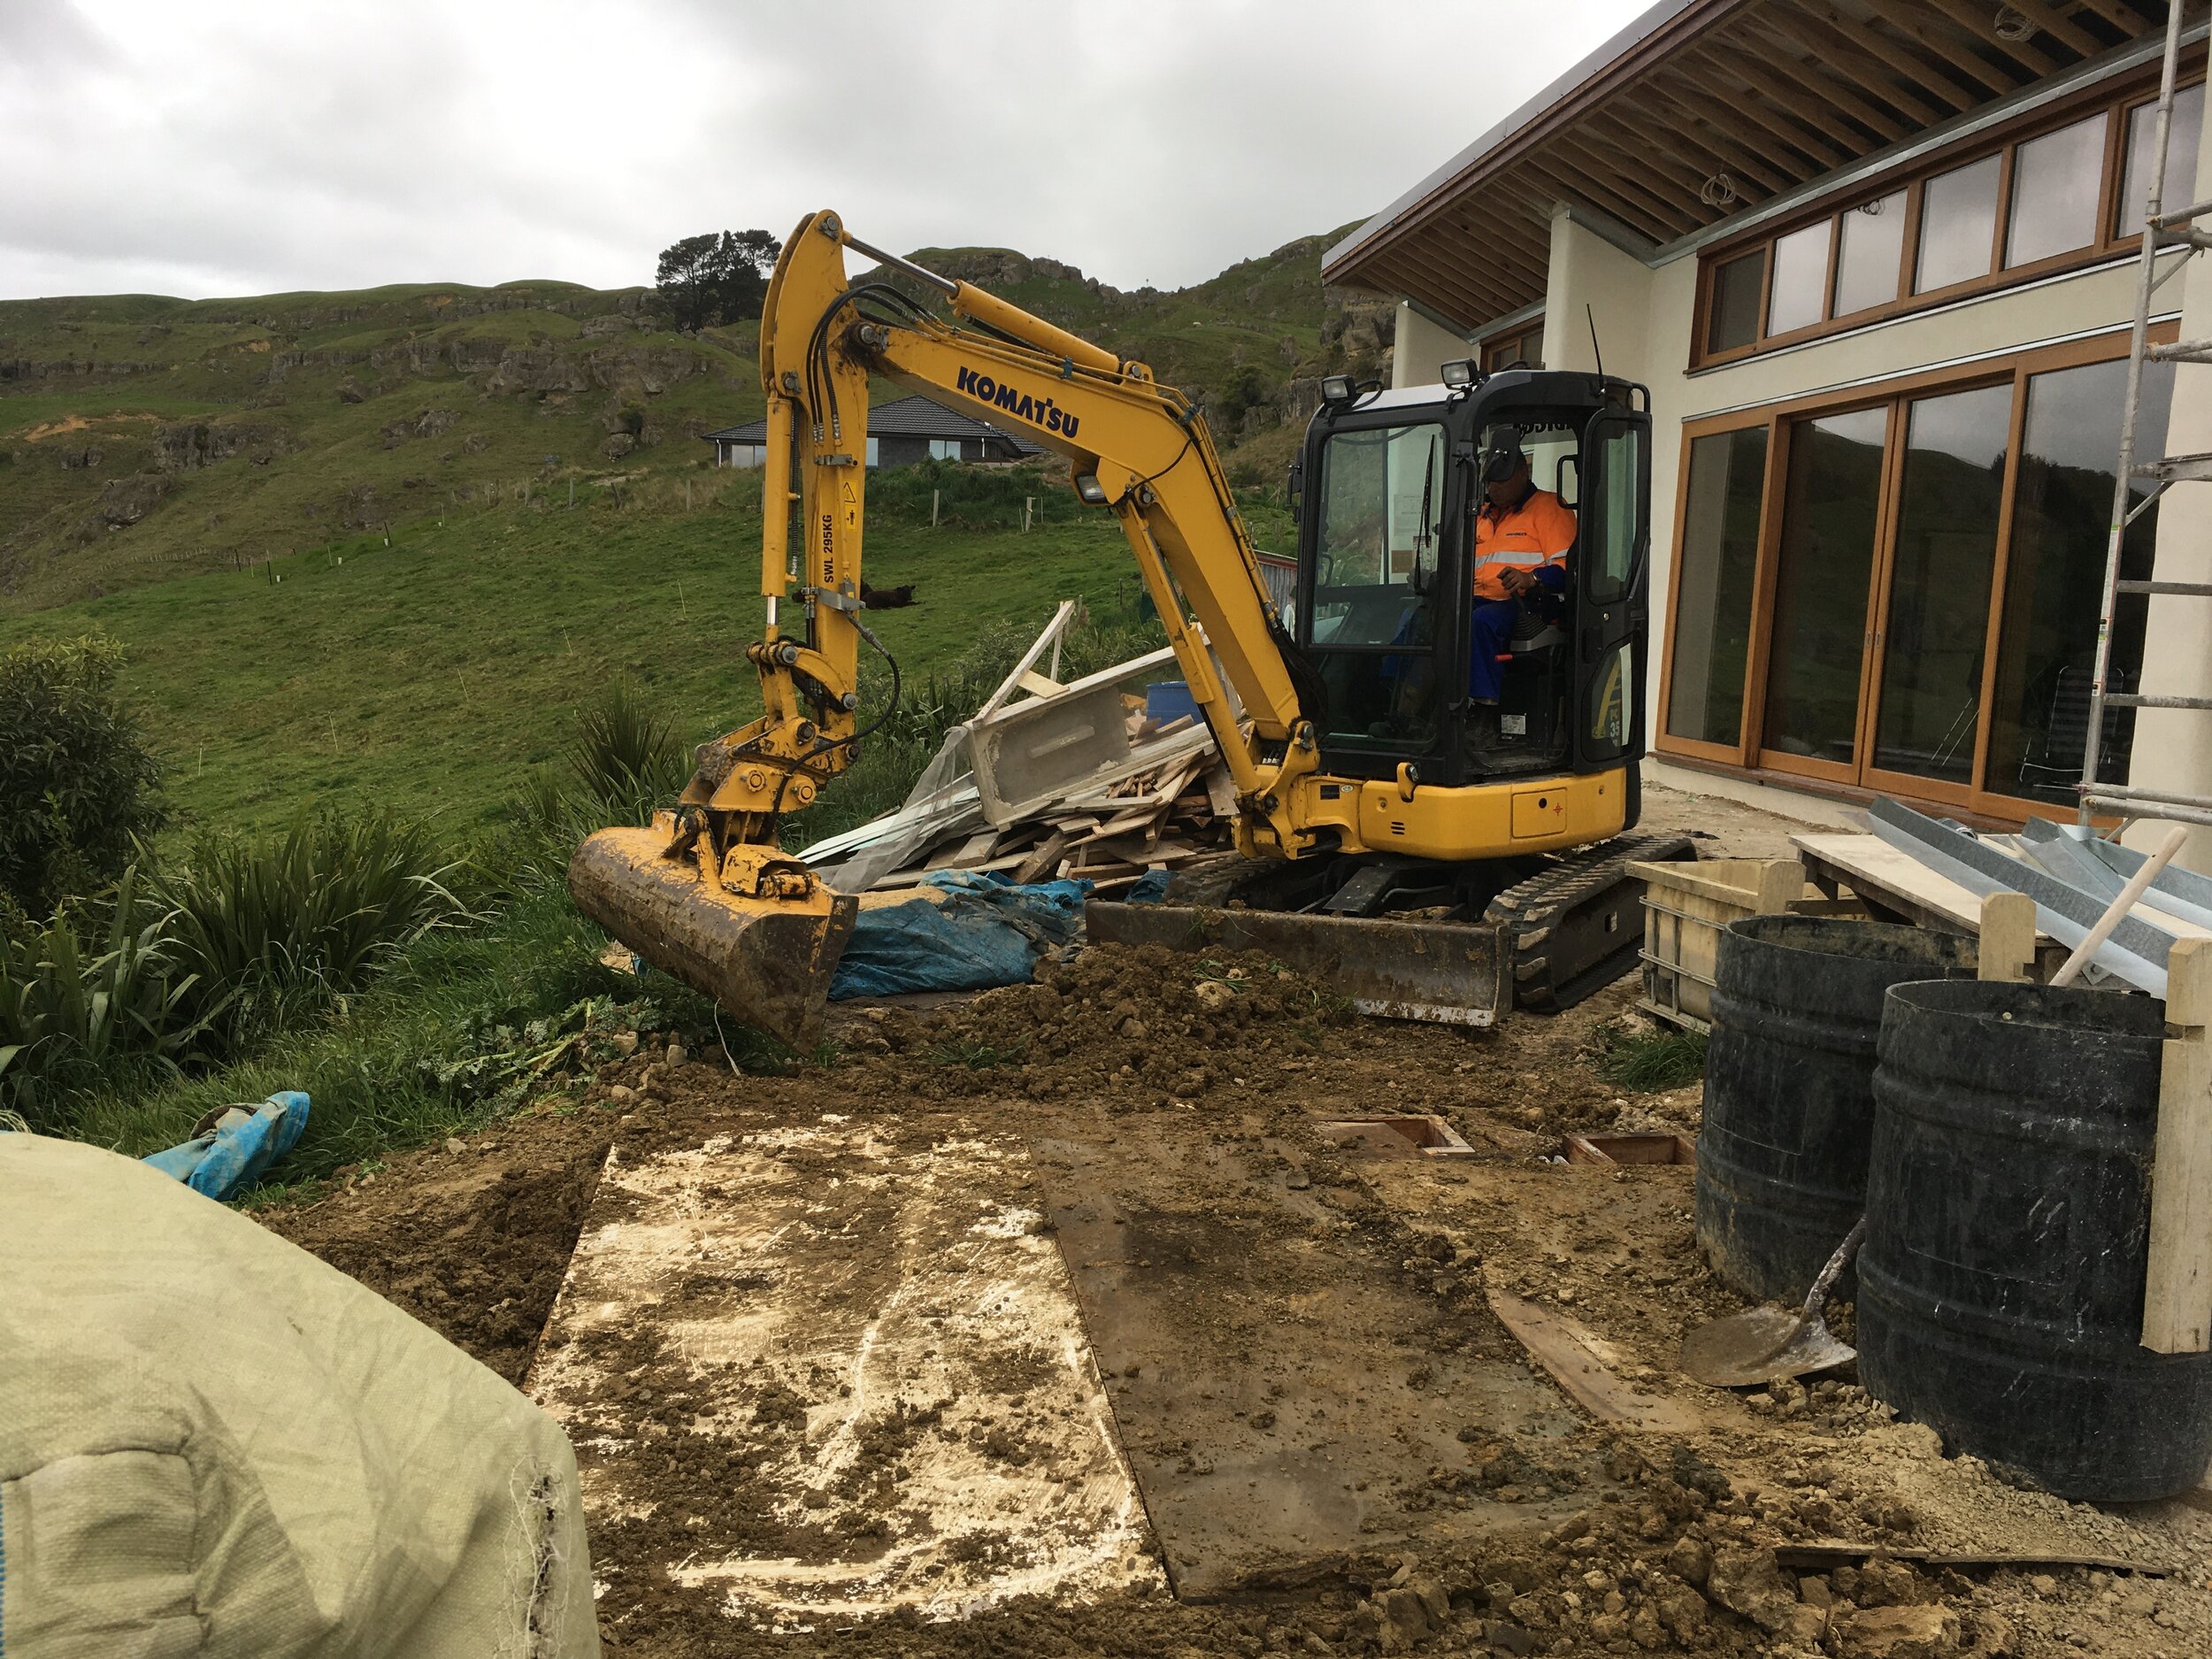
Michael in action around the front moving the last of our clay pile up to the back of the property as our reserve for future repairs or alterations

Michael in action round the back getting the levels set using our laser, also east soffits in with stainless steel grills for extraction exhausts from toilet and bathroom
As soon as Michael was done, Everett started on the back deck with putting in the piles and I put in a drain under the deck that connected up to our perimeter drain. It was also time to put in the main entrance pathway to the back deck, the paved patio area around the pizza oven and bbq area and to prepare for a small retaining wall with a lawn terrace behind for winter entertaining (Pat’s suggestion after our mid-winter BBQ with people sitting in the sun up on the bank). So more earthworks, but this time with a spade, shovel and wheel barrow.
In between other jobs we also built the woodshed from old vineyard strainer posts and some scrap steel roofing iron and flashings, and I moved our wood pile (for the third time) back to its final home with help from Pat’s son Jake. Here’s the photo montage..

The start point, a few limestone rocks in a pile ready for the retaining wall

Stripping top-soil ready for the patio area base course

Loaded wood shed ready for wood fired pizza’s..

Starting to lay the recycled brick pathway edging onto the crushed concrete base course

Piles cemented in for the back deck, temp downpipes still on the house and paving earthworks underway

The last Tumu’s delivery for the decking timber

Pathway edging laid on compacted crushed concrete base course, natural paving mesh on top ready for stones, riverstone fill alongside the house and geotextile under it all to minimise future weeding

Starting to lay the deck, beautiful eucalyptus saligna (red gum) from Ruapehu sawmills, in the background the patio paving grid partially laid

A wide shot with more patio paving grid laid, downpipes installed and that brown hill is the finished slope to our east, with our veggie garden on a broad platform on top

Pat and Everett laying, wedging, drilling, countersinking and screwing off the rear deck.

Pebbles in the main entrance pathway and the patio area and deck completed - ready for entertaining! Grass seed to go in once we have finished off work on the BBQ area to the left of the pizza oven and the retaining wall and terrace behind it.

Some more progress on the BBQ area, now paused waiting for more deck timber off-cuts from the front of the house to use for the slated benchtops and closing in the frame.
Meanwhile on the east end of the house an outdoor bathroom is starting to emerge, it is already fully plumbed in with hot/cold water and waste water thanks again to Kenny.

We will soon have an outdoor shower and bath to add to the existing site flush toilet that we are retaining as a house warming present from Pat :-).
Along with finishing off the retaining wall and terrace it’s something for me to keep chipping away at on the weekends in November and into December - hopefully it will help keep my waistline under control now that i’m back working in an office during the week.
Everett is still on-site and has moved onto clean up around the front of the house and the front decks.. here’s a photo from today!

With the rear entertaining area functional we had a roof shout for all who had worked on-site since we started the build a year ago. It was a happy day catching up with pizza and drinks in appreciation for everyones contribution :-) tinged with a little sadness as this project comes to a close. Here a picture of us with the core build team, Pat, Nils and Everett from RM Strawbale, Martin our interior plaster master and Bob and Geoff the sparkies - with apologies from Kenny from Advanced Plumbing who was away at his dad’s birthday. What a great team!

And last but not least we have new neighbours, Dir-an, Lindsay and the kids.. a lovely family. They purchased their land earlier this year and so far have completed earth works for the building platform, signed off their passive solar house plans, with consent granted by council, spring water connected to site and the power being trenched in next week. Like us they are living in a caravan in the lead in to their build, exciting as one home building project draws to a close another begins!

So the adventures continue, I have started IT work a week back commuting to Auckland and Aless is still here for the finishing touches. We will post a few more blog updates as completion of the decks, main bathroom, outdoor bathroom, driveway restoration and exterior house painting (with the kids at xmas) are all still ahead of us - these (apart from the painting) were all on our wish list and have made it into the build, brilliant! many many thanks to everyone who has worked with us to make this dream a reality.
